
Assembly and position of sensor and patch
Background#
This article contains a guide for assembling the patch and sensor, as well as instructions on how to apply the patch on the thigh.
Before proceeding, ensure that the sensor is active and assigned to the desired participant.
- Turn on the sensor: See here, how to turn on the sensor
- Assign a sensor to a patient: See here, how to assign a sensor to a patient
Guide to assembling and applying the patch#
Note the sensor ID found on the sensor label.
You will need a cleaning wipe, a sensor, and a sensor patch:
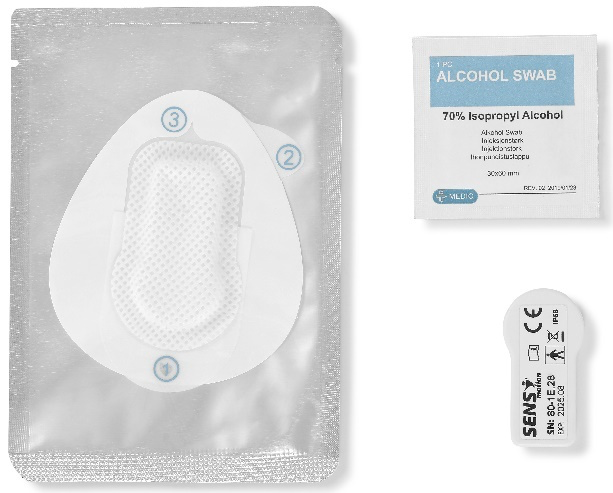
Place the sensor in the patch pocket with the SENS motion logo facing up and the sensor label facing down to the flat part of the patch:
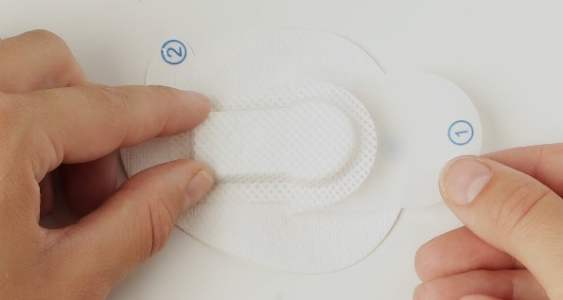
Pull down the bottom piece of foil/liner (marked no. 1) to allow the sensor and patch to be pressed together firmly. Press the patch thoroughly around the edges of the sensor to secure it:
With the cleaning wipe, clean the skin where the patch should be placed:
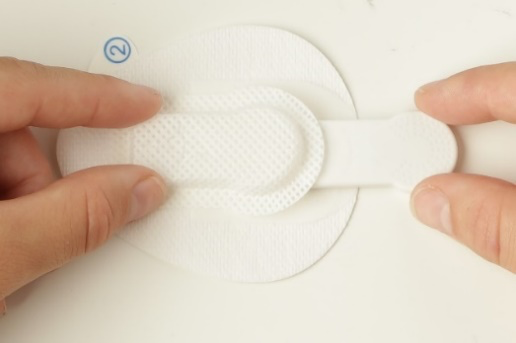
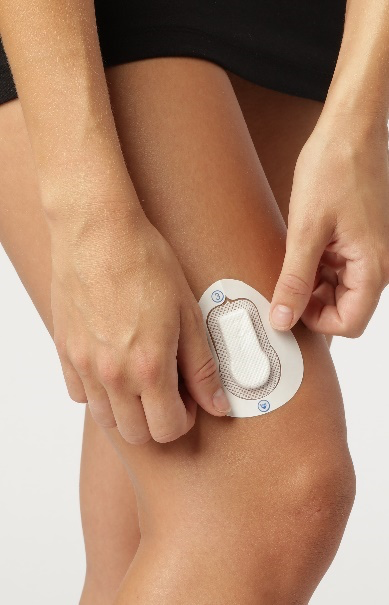
Remove the back (marked no. 2):

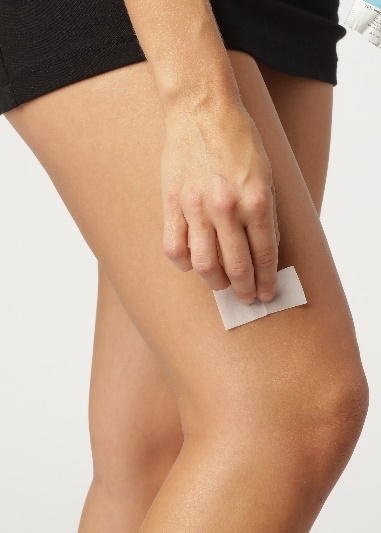
Gently adhere the patch on the outer side of the thigh. Press firmly to ensure it adheres evenly. The round part of the sensor must face down towards the knee:
If your patch has a white edge (marked no. 3), remove it. If not, the sensor application is complete after step 6. Patch type B uses a 3-step patch; patch type C is a 2-step patch and you can skip this step:
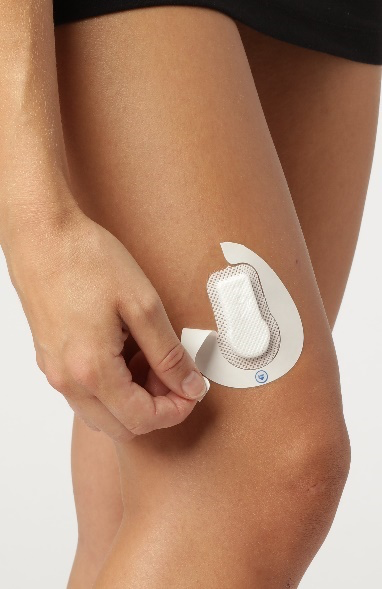
The assembly and application of the patch and the sensor is now complete.
Factors affecting patch adhesion#
There are a few key factors that can influence adhesion:
Drying time and water/sweat exposure
After applying a new patch, it is best to allow at least one day before activities such as swimming or biking, as water can weaken the adhesive during this initial period. Extended or frequent exposure to water (e.g., swimming several times per week) can further increase the risk of detachment, in which case additional patches may be needed.Skin products
Skin products such as oils, body lotion, or shaving cream can also affect adhesion. If used prior to applying the patch, this may reduce how well it sticks, so if possible, we advise you not to use those products.Activity level and environmental exposure
As the patch is designed to balance breathability and adhesion, activity level and environmental exposure can also affect adhesion.
Proper mounting is essential. If the patch or sensor is not applied exactly as instructed, adhesion can be affected. Once you begin, we recommend ensuring that all participants receive a short introduction to the correct mounting procedure and follow the official SENS guide closely.
We are continuously monitoring for any potential issues, so please reach out if you experience anything and share a bit about your setup (e.g. how the patch was mounted, activity level, water exposure), and we are happy to advise further based on your specific case.
For further mounting instructions, see the video below (only available with Danish subtitles):